


커넥션풀이나 네트워크 소켓처럼 스프링을 통해 시작 시점에 미리 연결, 종료시점에 모두 종료하는 작업이 있다.
이런 초기화 작업과 종료 작업을 어떻게 작업하는지 예시로 시작
Table of Content

외부 네트워크에 미리 연결하는 객체를 하나 생성한다고 가정
간단하게 url필드가 있는 외부 연결 대상 NetworkClient이 있다고 가정한다.
package hello.core.lifecycle;
public class NetworkClient {
private String url;
public NetworkClient() {
System.out.println("생성자 호출, url = " + url);
connect();
call("초기화 연결 메시지");
}
public void setUrl(String url) {
this.url = url;
}
//서비스 시작 호출
public void connect() {
System.out.println("connect: " + url);
}
public void call(String messege) {
System.out.println("call : " + url + "messege = " + messege);
}
//서비스 종료시 호출
public void disconnect() {
System.out.println("close : " + url);
}
}
Java
복사
위 클라이언트를 연결하는 테스트코드 1
package hello.core.lifecycle;
import org.junit.jupiter.api.Test;
import org.springframework.context.ConfigurableApplicationContext;
import org.springframework.context.annotation.AnnotationConfigApplicationContext;
import org.springframework.context.annotation.Bean;
import org.springframework.context.annotation.Configuration;
public class BeanLifeCycleTest {
@Test
public void lifeCycleTest() {
ConfigurableApplicationContext ac = new AnnotationConfigApplicationContext(LifeCycleConfig.class);
NetworkClient client = ac.getBean(NetworkClient.class);
ac.close();
}
@Configuration
static class LifeCycleConfig {
@Bean
public NetworkClient networkClient() {
NetworkClient networkClient = new NetworkClient();
networkClient.setUrl("http://hello-spring.dev");
return networkClient;
}
}
}
Java
복사
해당 설정 정보를 보면 NetworkClient 객체를 생성하고 또한 생성자 내부에서 이후에 setUrl()메소드를 통해 url을 전달하고 있다.
이때 결과로는 url이 전달되지 못하는 문제가 발생하는 것을 볼 수 있다.

객체의 생성과 초기화를 분리하자
스프링 빈은 간단하게 객체 생성 → 의존관계 주입 과 같은 라이프 사이클을 가진다.
•
스프링 컨테이너 생성 → 스프링 빈 생성 → 의존관계주입 → 초기화 콜백 → 사용 → 소멸전 콜백 → 스프링 종료
따라서 스프링 빈의 의존관계 주입까지 모두 완료된 후에 데이터를 사용(setUrl로 url을 입력할 수 있는 준비)해야 한다.
따라서 생성자 안에서 초기화 작업을 함께하는것 보다 객체를 생성하는 부분과 초기화 하는 부분을 명확하게 나누어야 유지보수 관점에서 좋다.
3가지 방법의 빈 생명주기 콜백
그럼 어떤 방식으로 스프링 빈을 초기화 할 수 있을지, 사용, 소멸 콜백 할 수 있을지는 다음과 같다.
•
인터페이스(InitializingBean, DisposableBean)
•
설정 정보에 초기화 메서드, 종료 메서드 지정
•
@PostConstruct, @PreDestroy 애너테이션 지원
1. InitializingBean(초기화), DisposableBean(소멸) 인터페이스 상속 사용(초기 사용권장X)
NetworkClient의 클래스에 InitializingBean, DisposableBean을 상속받으면 afterPropertiesSet()라는 초기화 관련 메서드, destroy()와 같은 소멸 메소드를 사용 할 수 있다.
변경된 NetworkClient 코드
package hello.core.lifecycle;
import org.springframework.beans.factory.DisposableBean;
import org.springframework.beans.factory.InitializingBean;
public class NetworkClient implements InitializingBean, DisposableBean {
private String url;
public NetworkClient() {
System.out.println("생성자 호출, url = " + url);
connect();
call("초기화 연결 메시지");
}
public void setUrl(String url) {
this.url = url;
}
//서비스 시작 호출
public void connect() {
System.out.println("connect: " + url);
}
public void call(String messege) {
System.out.println("call : " + url + "messege = " + messege);
}
//서비스 종료시 호출
public void disconnect() {
System.out.println("close : " + url);
}
@Override
public void afterPropertiesSet() throws Exception {
connect();
call("초기화 연결 메시지");
}
@Override
public void destroy() throws Exception {
disconnect();
}
}
Java
복사
이후 위 연결 테스트를 다시 실행하면 정상적으로 빈 생성 이후 url이 초기화 되며 소멸 메소드도 호출 되는 것을 확인 할 수 있다.

초기화, 소멸 인터페이스 사용의 단점
위 처럼 문제가 해결 될 수 있지만 단점이 있다.

•
이 인터페이스는 스프링 전용 인터페이스이다.(스프링 전용에 의존되는 단점)
•
초기화, 소멸 메서드의 이름을 변경 할 수 없다.(유연성 부족)
•
내가 코드를 고칠 수 없는 외부라이브러리에 적용 할 수 없다.(유연성 부족)
따라서 이 방안들은 스프링 초기에 구축된 방안(2003년..)이며 최근에는 자주 사용되지 않는다.
2. 시작, 종료 메서드 직접 작성
springframework에 의존되지 않도록 직접 초기화, 종료 메서드를 작성한다.
변경된 NetworkClient 코드
package hello.core.lifecycle;
public class NetworkClient {
private String url;
public NetworkClient() {
System.out.println("생성자 호출, url = " + url);
connect();
call("초기화 연결 메시지");
}
public void setUrl(String url) {
this.url = url;
}
//서비스 시작 호출
public void connect() {
System.out.println("connect: " + url);
}
public void call(String messege) {
System.out.println("call : " + url + "messege = " + messege);
}
//서비스 종료시 호출
public void disconnect() {
System.out.println("close : " + url);
}
public void init() throws Exception {
connect();
call("초기화 연결 메시지");
}
public void close() throws Exception {
disconnect();
}
}
Java
복사
implements 받던 인터페이스를 제거하고 원하는 이름으로 시작, 종료 메서드를 만들고 빈 설정 부분(@Configuration) 에서 추가적으로 initMethod, destroyMethod에 이름을 명시한다.
package hello.core.lifecycle;
import org.junit.jupiter.api.Test;
import org.springframework.context.ConfigurableApplicationContext;
import org.springframework.context.annotation.AnnotationConfigApplicationContext;
import org.springframework.context.annotation.Bean;
import org.springframework.context.annotation.Configuration;
public class BeanLifeCycleTest {
@Test
public void lifeCycleTest() {
ConfigurableApplicationContext ac = new AnnotationConfigApplicationContext(LifeCycleConfig.class);
NetworkClient client = ac.getBean(NetworkClient.class);
ac.close();
}
@Configuration
static class LifeCycleConfig {
@Bean(initMethod = "init", destroyMethod = "close")
public NetworkClient networkClient() {
NetworkClient networkClient = new NetworkClient();
networkClient.setUrl("http://hello-spring.dev");
return networkClient;
}
}
}
Java
복사
해당 방식으로도 정상적으로 스프링 빈 생성, url 이 정상적으로 작동하는 것을 볼 수 있다.

설정 정보 사용의 특징
•
메서드 이름을 자유롭게 사용 가능(관례적으로 init(), close()사용)
•
스프링 빈이 스프링 코드(인터페이스)에 의존하지 않는 장점
•
코드가 아니라 설정 정보를 사용하기 때문에 코드를 고칠 수 없는 외부 라이브러리에도 초기화, 종료메서드를 적용 시킬 수 있다.
•
종료 메서드 지정하는 속성인 destroyMethod는 기본값으로 (inferred)로 되어 있어 close, shutdown 등 이름을 자동으로 호출하기도 한다. 종료 메서드를 인위적으로 사용하지 않고자 할때는 빈값(destroyMethod = “”)을 기입
3. 애너테이션 @PostConstruct, @PreDestroy 사용 권장
위 두 방식보다 현재는 애너테이션 방법을 사용하는 것이 권장되고 있다. 간편하게 NetworkClient 코드에서 애너테이션을 작성하면 된다.
package hello.core.lifecycle;
import javax.annotation.PostConstruct;
import javax.annotation.PreDestroy;
public class NetworkClient {
private String url;
public NetworkClient() {
System.out.println("생성자 호출, url = " + url);
connect();
call("초기화 연결 메시지");
}
public void setUrl(String url) {
this.url = url;
}
//서비스 시작 호출
public void connect() {
System.out.println("connect: " + url);
}
public void call(String messege) {
System.out.println("call : " + url + "messege = " + messege);
}
//서비스 종료시 호출
public void disconnect() {
System.out.println("close : " + url);
}
@PostConstruct
public void init() {
System.out.println("NetworkClient.init");
connect();
call("초기화 연결 메시지");
}
@PreDestroy
public void close() {
System.out.println("NetworkClient.close");
disconnect();
}
}
Java
복사
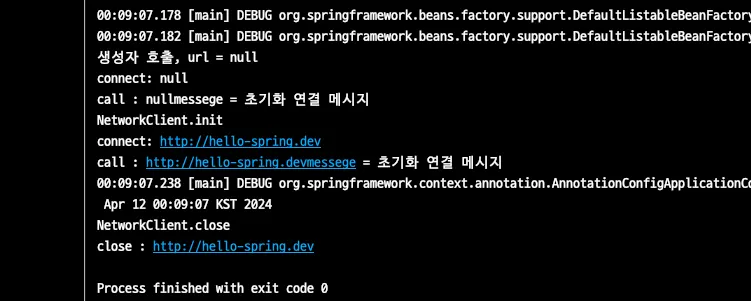
test코드는 기존 상태로 원상 복구 시켜 테스트했다.
package hello.core.lifecycle;
import org.junit.jupiter.api.Test;
import org.springframework.context.ConfigurableApplicationContext;
import org.springframework.context.annotation.AnnotationConfigApplicationContext;
import org.springframework.context.annotation.Bean;
import org.springframework.context.annotation.Configuration;
public class BeanLifeCycleTest {
@Test
public void lifeCycleTest() {
ConfigurableApplicationContext ac = new AnnotationConfigApplicationContext(LifeCycleConfig.class);
NetworkClient client = ac.getBean(NetworkClient.class);
ac.close();
}
@Configuration
static class LifeCycleConfig {
@Bean
public NetworkClient networkClient() {
NetworkClient networkClient = new NetworkClient();
networkClient.setUrl("http://hello-spring.dev");
return networkClient;
}
}
}
Java
복사
테스트 결과 정상적으로 작동하는 것을 볼 수 있다.
애너테이션 사용의 특징
•
최신 스프링에서 가장 권장되는 방법
•
애너테이션 하나만 붙이면 되므로 매우 간편
•
패키지는 javax.annotation…으로 스프링에 의존된 기술이 아니라 JSR-250이라는 자바 표준 기술로 다른 컨테이너에서도 동작
•
컴포넌트 스캔과 잘어울린다
•
단점은 외부 라이브러리에는 적용하지 못하는 단점,(외부 라이브러리 초기화, 종료해야 하면 위 @Bean에 메서드 기능을 사용하자.)
Related Posts
Search