NestJS, TypeORM, Angular 이해하기
Table of Content
1. 인증(Authentication)과 인가(Authorization)의 이해 복습
1.1 인증과 인가의 용어 정리
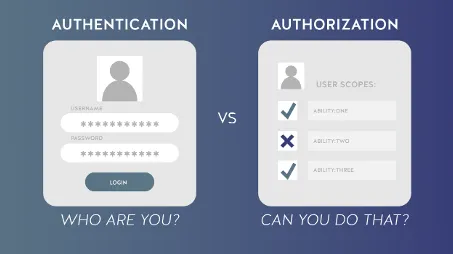
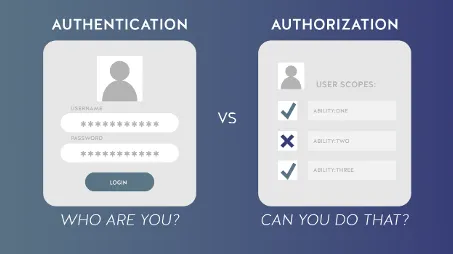
인증(Authentication)
•
인증은 해당 유저가 DB에 존재하는 실제 유저인지 인증하는 개념
인가(Authorization)
•
인가는 해당 유저가 특정 리소스에 접근이 가능한지 허가를 확인하는 개념
1.2 Angular에서의 Guard 사용
Guard란?
•
Guard는 주로 인가(Authorization)와 인증(Authentication)을 처리하는 데 사용되는 모듈
•
백엔드에서 NestJS 프레임워크에서 특정 요청에 대한 접근을 제어하는 데 Guard를 사용 하듯, 프론트엔드에서도 Angular(Ionic 포함)의 Guard를 통해 라우팅에 대한 접근 권한을 관리 함
프론트엔드에서 인가 처리의 이유
•
라우팅 보호 측면
◦
접근 제어 : 특정 경로에 접근할 수 있는 사용자를 제한
▪
예시)
•
로그인하지 않은 사용자가 보호된 경로에 접근하려고 할 때, 로그인 페이지로 리다이렉트 시키려고 할 때
•
사용자의 역할이나 상태에 따라 특정 경로에 대한 접근을 허용하거나 거부 할 때
•
사용자 경험 향상 측면
◦
데이터 로딩 : 특정 경로에 접근하기 전에 데이터를 미리 로드하여 필요한 정보를 준비
▪
예시)
•
사용자가 특정 페이지로 이동하기 전에 필요한 데이터를 미리 가져와서 페이지가 로드될 때 데이터를 즉시 사용할 수 있도록 준비
•
Guard에서 비동기 요청을 처리하여, 데이터가 로드되기 전까지 페이지 전환을 차단하여 데이터가 준비된 상태에서 페이지를 볼 수 있도록 함
2. 접근 제어 해보기(Guard) 
2.1 로그인 상태에 따른 제어
2.1.1 접근 제어 기획
필요한 접근 제어를 생각해 보면 다음과 같다.
•
로그인 상태 자체에 대한 접근 제어
•
로그인 된 상태에서 해당 유저의 역할(UserRole)에 따른 접근 제어
그 외 상황에 따라 더 많은 제어가 필요 할 수도 있지만 예제에서는 이 정도 접근 제어를 다뤄보도록 한다. 기획에 따라 아래 구현을 응용하여 추가적인 가드를 생성해나가는 방식이다.
2.1.2 AuthGuard 클래스 생성
Guards 폴더에 모아두기
•
프로젝트는 전반적으로 역할과 기능에 대한 폴더로 구조화를 신경쓰고 있는 상태이다. 따라서,
◦
root 폴더에 guards라는 리소스 폴더를 생성해준다.
◦
해당 폴더 내에서 접근 제어와 관련된 가드들이 모이게 될 것이다.
•
해당 폴더 위치에서 터미널을 이용해서 아래 CLI 명령어로 가드를 생성 한다. 물론 수동으로 파일을 생성해도 큰 차이는 없다.
ng generate guard auth
Shell
복사
•
auth.guard.ts
◦
해당 파일이 생성되면 아래와 같이 클래스를 정의한다.
◦
AuthService를 통해 로그인 상태를 확인하고 이에 따라 true/false를 반환하는 단순한 로직이다.
import { Injectable } from '@angular/core';
import { CanActivate, Router } from '@angular/router';
import { AuthService } from '../services/auth/auth.service';
@Injectable({
providedIn: 'root',
})
export class AuthGuard implements CanActivate {
constructor(private authService: AuthService, private router: Router) {}
canActivate(): boolean {
if (this.authService.isLoggedIn()) {
return true;
} else {
this.router.navigate(['/login']);
return false;
}
}
}
TypeScript
복사
•
auth.service.ts
◦
위 가드 클래스에서 호출하고 있는 isLoggedIn() 메서드가 구현되어 있어야 한다.
◦
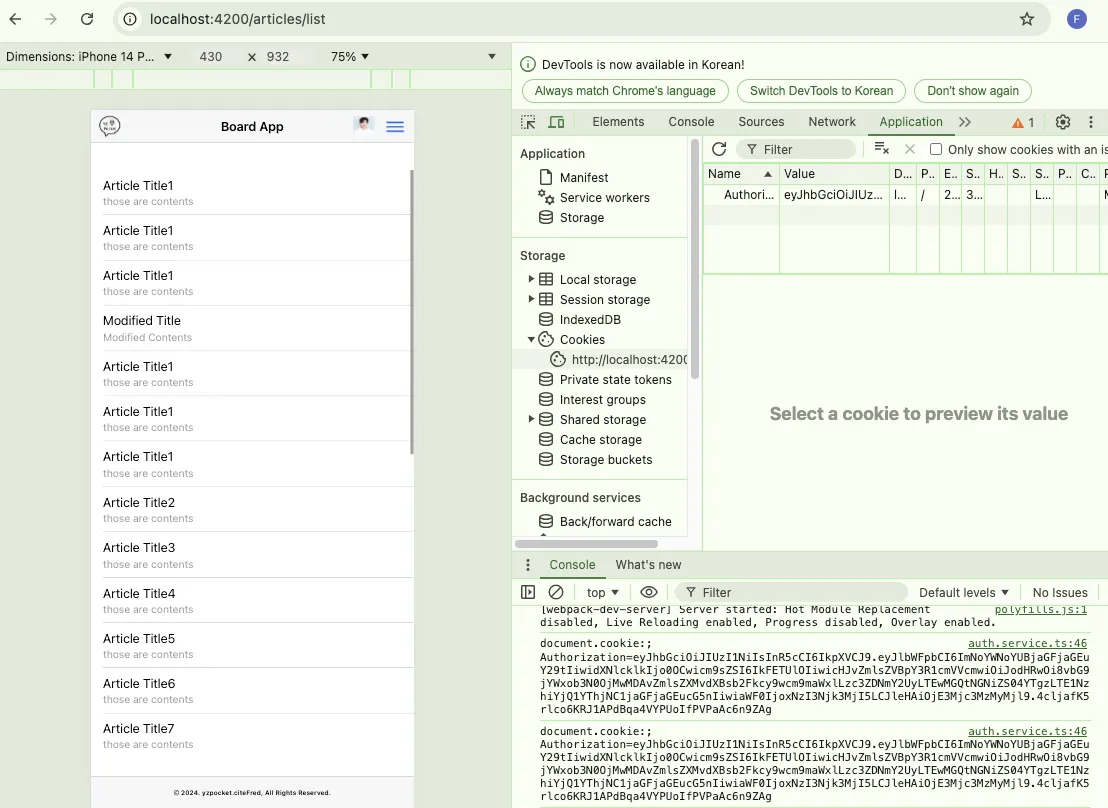
현재는 JWT-쿠키 방식으로 로그인 상태를 확인 하는 가장 단순한 형태를 선택했지만 추후 보다 정교한 검증 단계가 필요할 수도 있다.
@Injectable({
providedIn: 'root'
})
export class AuthService {
private apiUrl = 'http://localhost:3000/api/auth';
constructor(private http: HttpClient) { }
...
private getCookie(name: string): string | null {
const value = `; ${document.cookie}`;
console.log("document.cookie:"+ value)
const parts = value.split(`; ${name}=`);
if (parts.length === 2) {
const cookieValue = parts.pop()?.split(';').shift();
return cookieValue ? cookieValue : null;
}
return null;
}
isLoggedIn(): boolean {
const token = this.getCookie('Authorization');
return !!token;
}
...
}
TypeScript
복사
2.1.3 라우팅 모듈에 AuthGuard 적용
정의된 가드 적용 위치 고려
•
기획에서 생각한 서비스의 움직임은 “핵심 서비스 경로는 로그인된 상태여야 한다” 라는 점을 세부적으로 풀어보면
◦
게시글 CUD 관련 서비스는 모두 로그인 상태여야 한다.
▪
R 조회는 로그인 상태가 아니어도 된다는 것을 기억
◦
회원 RUD 관련 서비스는 모두 로그인 상태여야 한다.
▪
C 회원 가입은 로그인 상태가 아니어도 된다는 것을 기억
app-routing.module.ts
•
위 요구사항에 따라서 모든 경로를 관리하고 있는 에서 적용시킨다면 아래와 같다.
◦
아래처럼 라우팅 모듈에서 canActivate 속성을 추가하고 가드 클래스명을 작성하면 해당 URL에(아래 같은 경우엔 그 자식 경로까지 모두)적용하고자 하는 접근 제어가 적용된다.
◦
localhost:4200/my-page 자체에 접근하면 회원 RUD(조회, 수정, 삭제)를 할 수 있다. 따라서 전역으로 AuthGuard를 적용해도 무관하다.
▪
◦
const routes: Routes = [
{
path: '', component: HomeComponent,
},
{
path: 'articles',
loadChildren: () => import('./pages/article/article.module').then(m => m.ArticleModule)
},
{
path: 'auth',
loadChildren: () => import('./pages/auth/auth.module').then(m => m.AuthModule)
},
{
path: 'my-page',
loadChildren: () => import('./pages/user/user.module').then(m => m.UserModule),
canActivate: [AuthGuard]
}
];
@NgModule({
imports: [RouterModule.forRoot(routes)],
exports: [RouterModule]
})
export class AppRoutingModule {}
TypeScript
복사
•
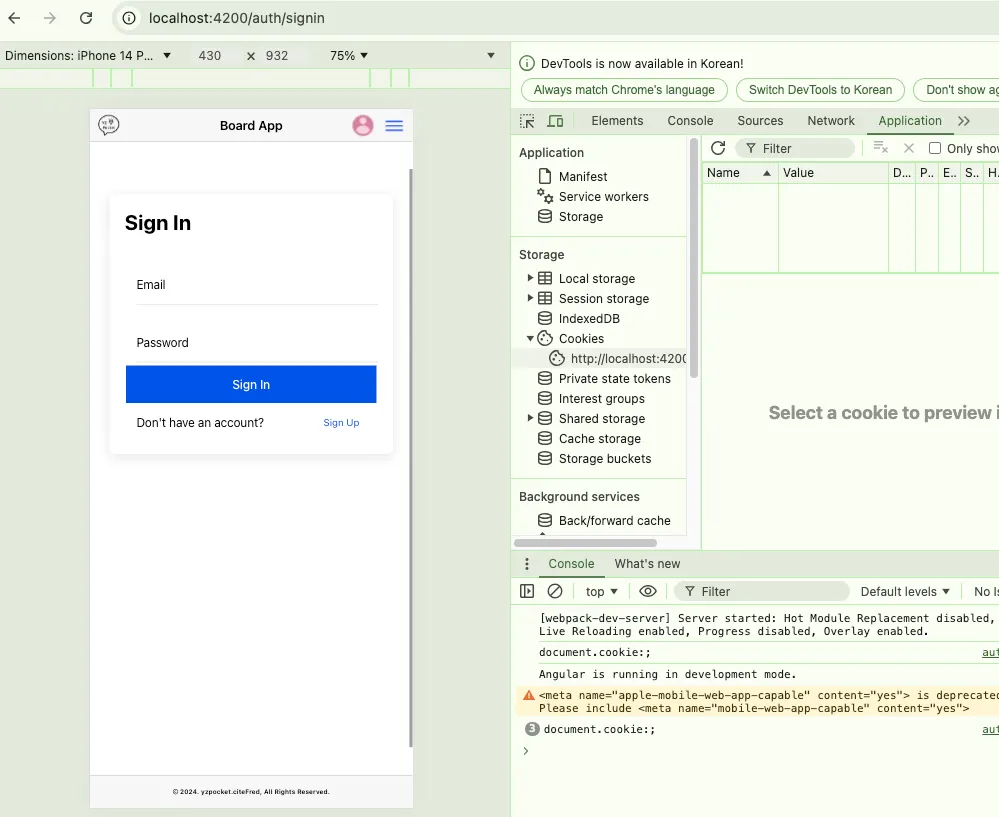
클라이언트 테스트
◦
로그인되지 않은 상태에서는 마이페이지에 접근 할 수 없다.
◦
로그인 페이지로 리다이렉트 된다.
◦
로그인된 상태에서는 마이 페이지에 접근, 수정 및 탈퇴 기능을 모두 이용 할 수 있다.
article-routing.module.ts
•
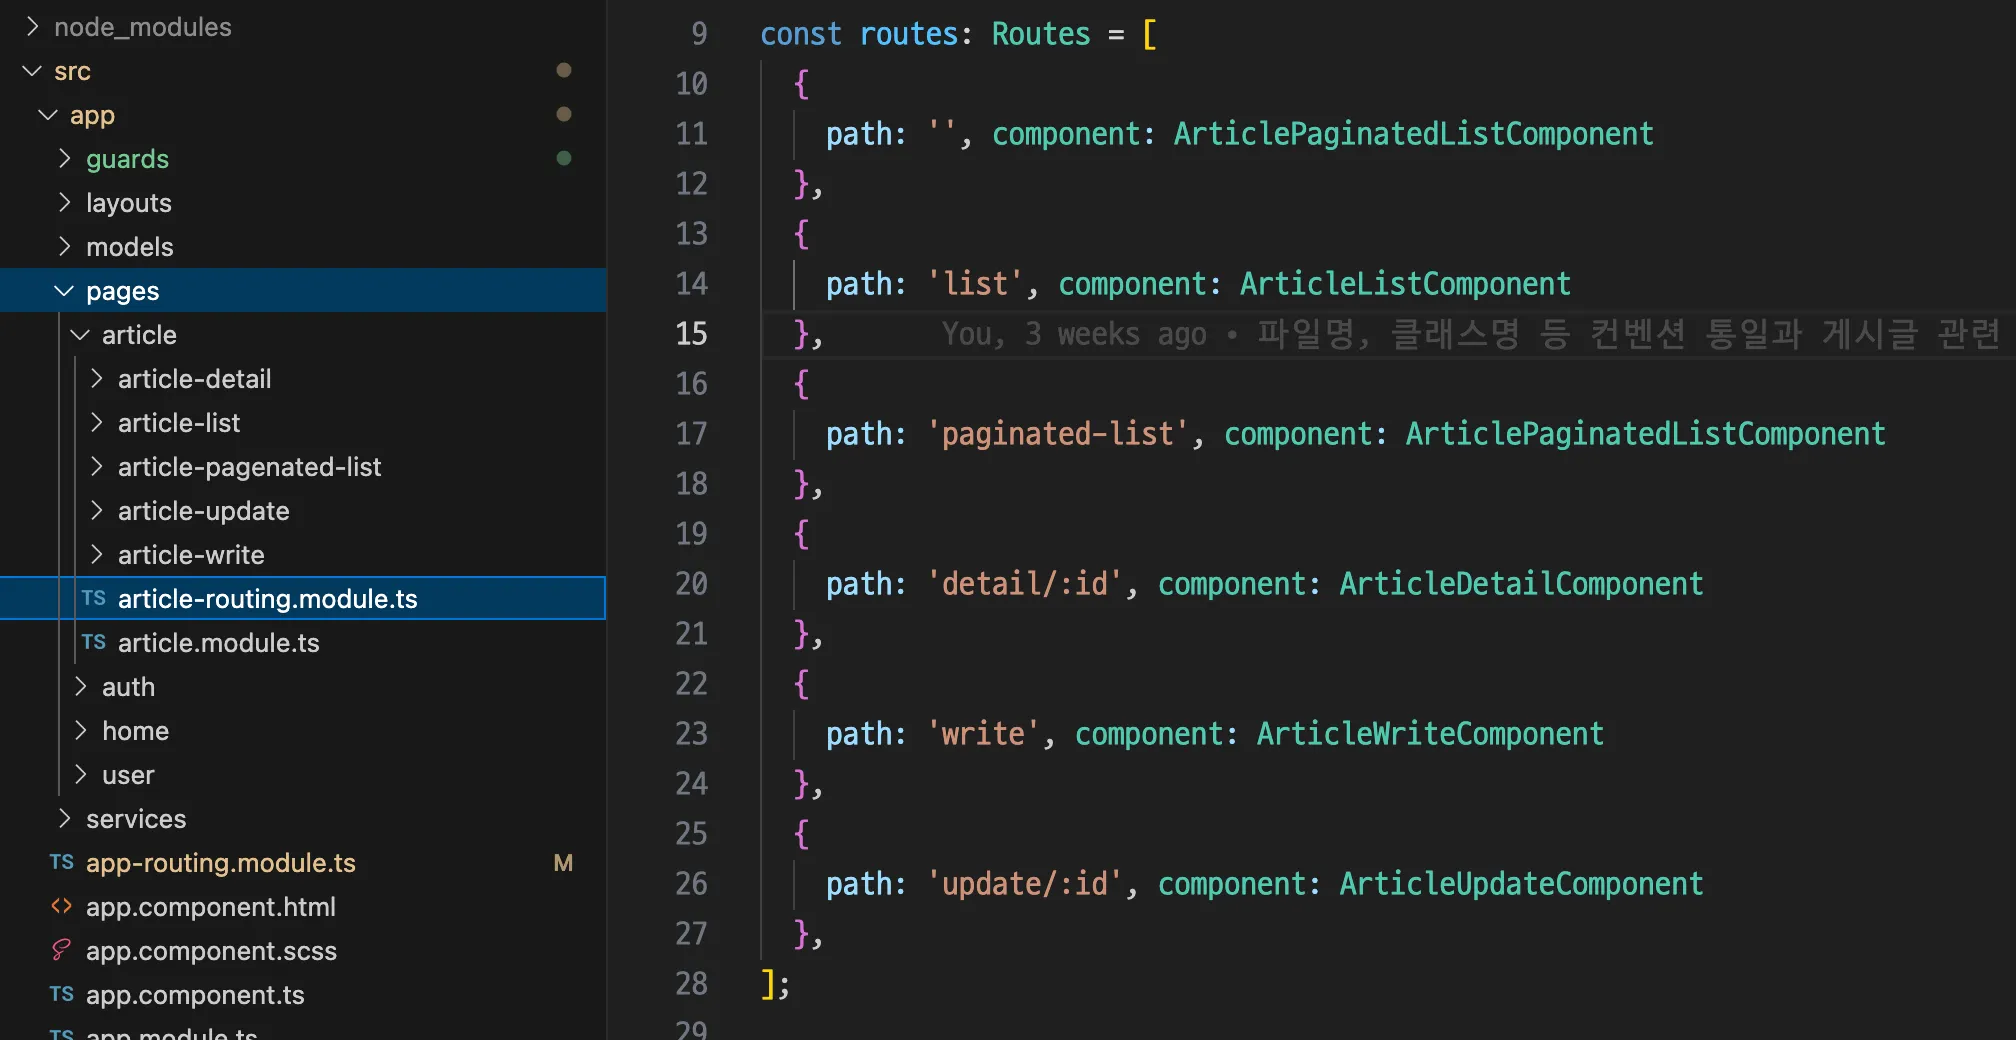
app-routing.module.ts에서 article로 정의된 경로의 자식 경로들은 article 리소스 폴더로 모듈화된 article-routing.module.ts가 세부 경로를 관리하는 계층적 구조를 가지고 있다.
•
게시글의 조회는 로그인을 필요로 하지 않고
•
게시글 작성, 수정, 삭제는 기본적인 로그인 상태를 확인하는 가드가 적용되어야 한다.
•
동일하게 AuthGuard를 라우터에 적용 시킨다.
const routes: Routes = [
{
path: '', component: ArticlePaginatedListComponent
},
{
path: 'list', component: ArticleListComponent
},
{
path: 'paginated-list', component: ArticlePaginatedListComponent
},
{
path: 'detail/:id', component: ArticleDetailComponent
},
{
path: 'write', component: ArticleWriteComponent,
canActivate: [AuthGuard]
},
{
path: 'update/:id', component: ArticleUpdateComponent,
canActivate: [AuthGuard]
},
];
@NgModule({
imports: [RouterModule.forChild(routes)],
exports: [RouterModule]
})
export class ArticleRoutingModule {}
TypeScript
복사
•
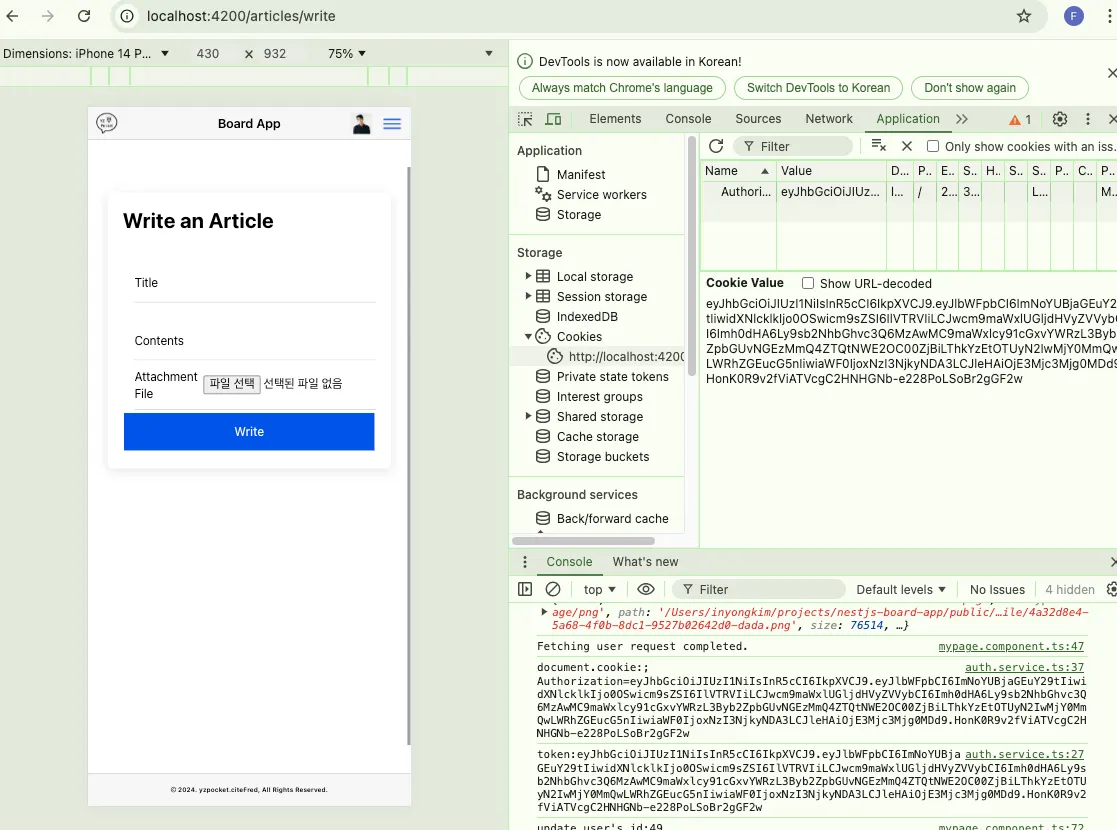
클라이언트 테스트
◦
로그인되지 않은 상태에서는 게시글 작성 양식 페이지로 접근 할 수 없다.
◦
로그인 페이지로 리다이렉트
◦
로그인된 상태에서는 게시글 작성, 수정, 삭제 기능에 접근 할 수 있다.
2.2 역할 권한 제어
2.2.1 접근 제어 기획
필요한 접근 제어를 생각해 보면 다음과 같다.
•
예시를 위해 게시글 목록 조회 기능중에 페이징 처리되지 않은 모든 목록을 불러오는 기능이 하나 있다.
•
해당 페이지 접근은 관리자(ADMIN)만 접근 할 수 있도록 샘플을 구현해보고자 한다.
가드는 여러개를 추가로 구현 할 수 있다.
•
로그인 가드는 이미 적용되고 있으며 역할별로 권한을 제어하는 것을 추가하고자 한다.
2.2.2 RoleGuard 클래스 생성
role.guard.ts
•
로그인 가드와 유사하지만 next, state라는 파라미터가 추가된다.
◦
특정 경로에 대한 추가적인 정보(예: 필요한 역할)나 상태(예: 현재 URL)를 확인해야 할 경우, next와 state를 매개변수로 받아 사용
◦
로그인 가드에서는 사용자가 로그인했는지를 확인하기만 하므로, 추가적인 경로 정보나 상태 정보를 필요로 하지 않으므로 생략된 것
•
아래 두개의 값을 비교하여 true/false를 반환한다.
1.
next.data['role'] 부분에서 다음 코드에서 라우터에서 제어 할 역할을 작성한 데이터가 들어온다.
2.
userRole 변수에는 실제 로그인한 유저의 역할값을 받아오게 된다.
•
역할 말고도 상태 등으로 응용 구현 할 수 있다.
•
추가로 역할에 대한 잘못된 접근이기 떄문에 리다이렉트 경로를 오류페이지로 설정했다.
◦
this.router.navigate(['common/forbidden']);
◦
위 오류 페이지는 페이지 컴포넌트를 추가하던 것을 응용하여 추가 작성해보도록 하자.
import { Injectable } from '@angular/core';
import { ActivatedRouteSnapshot, CanActivate, Router, RouterStateSnapshot } from '@angular/router';
import { AuthService } from '../services/auth/auth.service';
@Injectable({
providedIn: 'root',
})
export class RoleGuard implements CanActivate {
constructor(private authService: AuthService, private router: Router) {}
canActivate(
next: ActivatedRouteSnapshot,
state: RouterStateSnapshot
): boolean {
const requiredRole = next.data['role'];
const userRole = this.authService.getUserRoleFromToken();
if (userRole === requiredRole) {
return true;
} else {
this.router.navigate(['error/forbidden']);
return false;
}
}
}
TypeScript
복사
2.2.3 로그인된 유저의 UserRole을 가져오는 로직 추가
auth.service.ts
•
토큰으로부터 UserRole을 가져 올 수 있도록 getUserRoleFromToken() 메서드를 추가 구성한다.
@Injectable({
providedIn: 'root'
})
export class AuthService {
private apiUrl = 'http://localhost:3000/api/auth';
constructor(private http: HttpClient) { }
signUp(formData: FormData): Observable<AuthResponse> {
return this.http.post<AuthResponse>(`${this.apiUrl}/signup`, formData, { withCredentials: true });
}
signIn(signInRequestData: SignInRequestData): Observable<AuthResponse> {
const headers = new HttpHeaders({ 'Content-Type': 'application/json' });
return this.http.post<AuthResponse>(`${this.apiUrl}/signin`, signInRequestData, { headers, withCredentials: true });
}
getUserIdFromToken(): number | null {
const token = this.getCookie('Authorization');
console.log("token:"+ token)
if (token) {
const decodedToken: any = jwtDecode(token);
return decodedToken.userId;
}
return null;
}
getUserRoleFromToken(): string | null {
const token = this.getCookie('Authorization');
if (token) {
const decodedToken: any = jwtDecode(token);
return decodedToken.role || null;
}
return null;
}
private getCookie(name: string): string | null {
const value = `; ${document.cookie}`;
console.log("document.cookie:"+ value)
const parts = value.split(`; ${name}=`);
if (parts.length === 2) {
const cookieValue = parts.pop()?.split(';').shift();
return cookieValue ? cookieValue : null;
}
return null;
}
isLoggedIn(): boolean {
const token = this.getCookie('Authorization');
return !!token;
}
getUserProfilePictureFromToken(): string | null {
const token = this.getCookie('Authorization');
if (token) {
const decodedToken: any = jwtDecode(token);
return decodedToken.profilePictureUrl || null; // 프로필 사진 URL 반환
}
return null;
}
}
TypeScript
복사
2.2.4 라우팅 모듈에 RoleGuard 적용
article-routing.module.ts
•
가드 작동여부를 체크하기 위한 샘플로 전체 게시글 목록 조회를 접근하는 라우터에 로그인 가드와 동일하게 작성한 RoleGuard를 적용한다.
•
여기서 추가적으로 data에 role: ADMIN 값을 넣게 되면서 위 requiredRole 변수에서 해당 라우터에서 필요로하는 권한을 설정하게 된다.
◦
이 값과 로그인 유저의 JWT로부터 가져온 실제 UserRole을 비교하여 해당 경로에 접근 여부가 결정된다.
const routes: Routes = [
{
path: '', component: ArticlePaginatedListComponent
},
{
path: 'list', component: ArticleListComponent,
canActivate: [RoleGuard],
data: { role: 'ADMIN' }
},
{
path: 'paginated-list', component: ArticlePaginatedListComponent
},
{
path: 'detail/:id', component: ArticleDetailComponent
},
{
path: 'write', component: ArticleWriteComponent,
canActivate: [AuthGuard]
},
{
path: 'update/:id', component: ArticleUpdateComponent,
canActivate: [AuthGuard]
},
];
@NgModule({
imports: [RouterModule.forChild(routes)],
exports: [RouterModule]
})
export class ArticleRoutingModule {}
TypeScript
복사
•
클라이언트 테스트
◦
로그인을 했지만 UserRole이 ADMIN이 아닌 경우 해당 페이지로 접근 할 수 없다.
◦
이번엔 로그인한 유저가 ADMIN인 경우
◦
ADMIN은 해당 URL에 접근 할 수 있다.
3. 데이터 로드 해보기(Resolver)
Guard에서는 Resolve를 통해서 데이터를 로드 할 수 있다.
•
해당 부분은 적용 시 현재 코드의 리팩토링이 다수 진행되기 때문에 선택적으로 진행 하도록 한다.
지금도 데이터 로드는 되는것 아닌가? 에 대한 궁금증
•
현재도 각 리소스의 Service에 HttpClient, 또는 Fetch를 통한 API 요청 메서드를 통해서 서버의 데이터를 받고 있고 뷰 페이지로 모델이 렌더링 되고 있다.
◦
위 과정은 각 컴포넌트 정의 파일 ( ???.component.ts ) 에서 OnInit 을 통해서 페이지가 로드 될 때 데이터를 로드하는 것이 정의되어 있다.
•
자연스럽게 Guard로 데이터를 로드하는건 무슨 차이인가? 라는 궁금증이 있어야 한다.
ngOnInit과 Resolve의 차이점
•
데이터 로딩의 시점에 따른 UX의 관점
◦
ngOnInit : 컴포넌트가 초기화된 후에 데이터를 가져 옴
▪
즉, 컴포넌트가 로드된 후에 비동기 요청을 보내게 되므로, 데이터가 로드되는 동안 컴포넌트가 빈 화면이 나타날 가능성이 있음
▪
로드 되는 시간을 대체하던 로딩 스피너가 있는 이유이다.
◦
Resolve : 라우트가 활성화(접근)되기 직전에 데이터를 미리 로드
▪
사용자가 해당 페이지로 이동하기 전에 필요한 모든 데이터가 준비되어 있어, 컴포넌트가 로드될 때 바로 사용 가능
•
오류 처리의 관점
◦
ngOnInit : 데이터 로딩 중 오류가 발생하면, 컴포넌트 내에서 오류를 처리
▪
사용자가 이미 컴포넌트에 들어가 있는 상태에서 오류 메시지를 표시해야 하기 때문에. 이 경우 사용자 경험이 덜 매끄럽게 제공됨
◦
Resolve : 데이터를 로드하는 도중 오류가 발생하면 라우트 전환을 막고, 다른 경로로 리다이렉트하거나 오류 페이지를 보여줄 수 있음
▪
사용자에게 더 깔끔한 오류 처리를 제공
3.1 Resolver 클래스 생성
Resolvers 모아두기
•
데이터 로드 관련 리소스를 모아두기 위하여 루트 경로에 resolvers 폴더를 생성하여 모아두고자 한다.
•
article-detail.resolver.ts
◦
article-detail.component.ts 에서 ngOnInit()에 작성되어 있던 loadArticle() 메서드가 이동된다고 생각 하면 된다.
@Injectable({
providedIn: 'root',
})
export class ArticleDetailResolver implements Resolve<ArticleWithAttachmentAndUserResponseData> {
constructor(private articleService: ArticleService) {}
resolve(route: ActivatedRouteSnapshot, state: RouterStateSnapshot): Observable<ArticleWithAttachmentAndUserResponseData> {
const id = route.paramMap.get('id');
return this.articleService.getArticleById(+id!).pipe(
map((response: ApiResponse<ArticleWithAttachmentAndUserResponseData>) => {
if (response.success) {
console.log("Router실행 시점 - 데이터 로드")
return response.data;
} else {
throw new Error(response.message);
}
})
);
}
}
TypeScript
복사
3.2 ngOnInit에서 기존 데이터 로드 호출 제거
article-detail.component.ts
•
ngOnInit에서는..
◦
loadArticle()로 서비스에 직접 호출하던 메서드가 Resolver로 이동되어 삭제되었다.
◦
하지만 Resolver가 로드한 데이터를 템플릿으로 전달해야 하기 때문에 인터페이스와 데이터만 표기해준다.
interface RouteData {
article: ArticleWithAttachmentAndUserResponseData;
}
@Component({
selector: 'app-article-detail',
templateUrl: './article-detail.component.html',
styleUrls: ['./article-detail.component.scss'],
})
export class ArticleDetailComponent implements OnInit {
article: ArticleWithAttachmentAndUserResponseData | undefined;
showDeleteAlert: boolean = false;
constructor(
private route: ActivatedRoute,
private articleService: ArticleService,
private location: Location,
private router: Router,
private alertController: AlertController
) {}
ngOnInit() {
this.route.data.subscribe((data) => {
console.log("ngOnInit 로드 시점")
const articleData = data as RouteData;
this.article = articleData.article;
});
}
// 기타 메서드는 그대로
isImage(url: string): boolean {
...
}
downloadFile(url: string) {
...
}
updateArticle() {
...
}
goBack() {
...
}
async confirmDelete() {
...
}
deleteArticle() {
...
}
TypeScript
복사
3.3 라우팅 모듈에 Resolver 적용
article-routing.module.ts
•
게시글 상세 정보 데이터를 호출하는 부분이 resolver 클래스로 작성되고 이것이 라우터에 아래와 같이 작성 되면 라우터 접근 직전 데이터를 미리 로드한다.
•
외관적으로 현재는 차이는 없지만 앞서 설명과 같이 로딩 시점의 차이가 있다.
const routes: Routes = [
{
path: '', component: ArticlePaginatedListComponent
},
{
path: 'list', component: ArticleListComponent,
canActivate: [RoleGuard],
data: { role: 'ADMIN' }
},
{
path: 'paginated-list', component: ArticlePaginatedListComponent,
resolve: { articles: ArticlePagenatedListResolver }
},
{
path: 'detail/:id', component: ArticleDetailComponent,
resolve: { article: ArticleDetailResolver }
},
{
path: 'write', component: ArticleWriteComponent,
canActivate: [AuthGuard]
},
{
path: 'update/:id', component: ArticleUpdateComponent,
canActivate: [AuthGuard]
},
];
@NgModule({
imports: [RouterModule.forChild(routes)],
exports: [RouterModule]
})
export class ArticleRoutingModule {}
TypeScript
복사
•
클라이언트 테스트
◦
우측 개발자도구의 로그를 보면 Router 실행 시점에서 데이터 로드가 먼저 나타나고 ngOnInit으로 로드되는 실행 순서를 볼 수 있다.
PS. Github
•
리팩토링 완료 된 결과 코드 묶음은 Github를 참고
•
Backend
•
Frontend
Related Posts
Search
.jpg)

