NestJS, TypeORM 이해하기
Table of Content
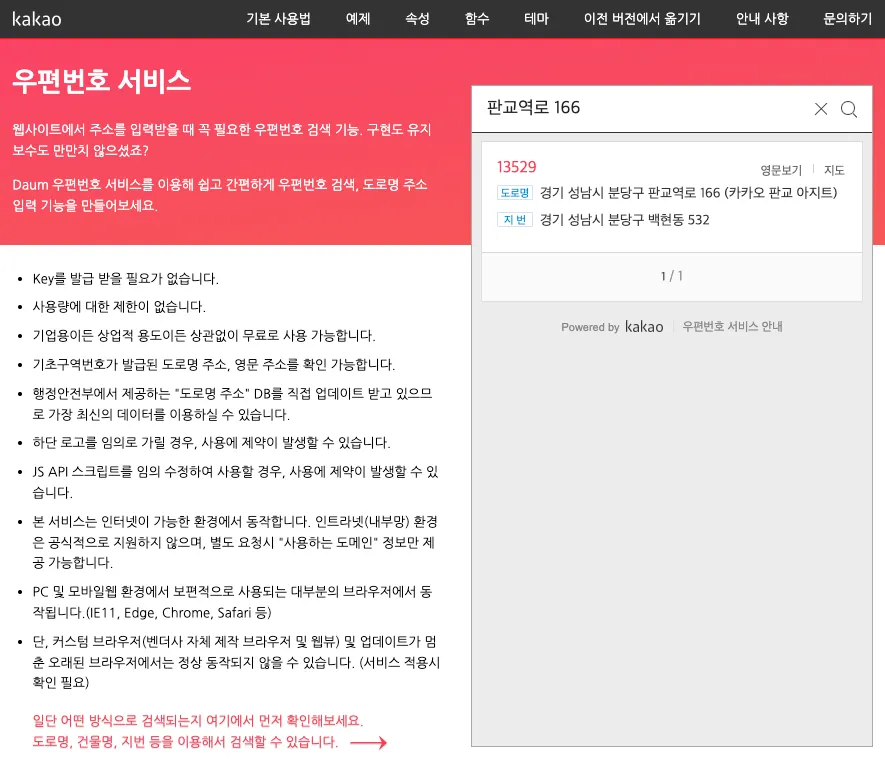
1. 다음 우편번호 API 서비스 활용하기
해당 부분은 프론트엔드에서 처리할 로직이 대부분이다.
•
하지만 해당 API 기능을 사용하게 된다면 서버에서도 주소 관련 데이터를 받을 준비를 해야 한다.
반환되는 데이터 확인하기
•
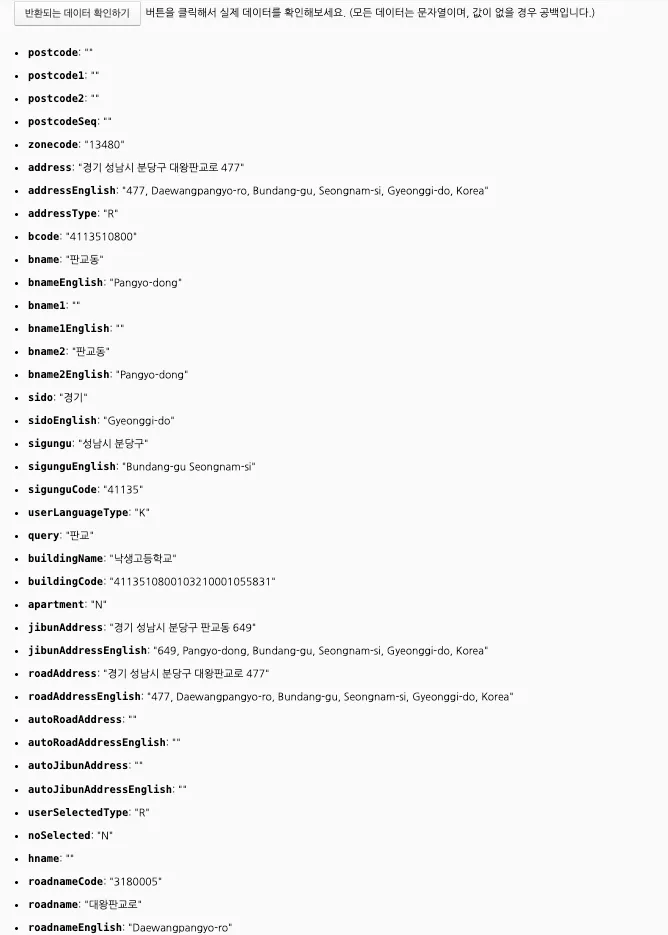
기본적으로 이런 외부 API의 경우 이미 정해진 변수명, 타입 등으로 데이터를 JSON 형태로 내보내준다.
•
Kakao 주소검색 API 에서 반환해주는 데이터의 예시는 다음과 같다.
•
여기서 중요한 Key, Value는 다음과 같다.
◦
zonecode : 우편번호 (* 구버전에서는 postcode였으나 변경됨)
◦
address : 주소 (한글주소)
여기까지는 주소 검색을 통해서 제공 될 부분
•
주소에서 세부 주소(동호수 등)이 필요하기 때문에 detailAddress 입력 필드가 추가로 필요하다.
프론트엔드에서 고려할 점
•
API가 제공해주는 데이터의 postcode, postalcode같은 명칭을 기대했으나 zonecode라는 명칭이 사용되고 있다.
◦
이는 API 사용자인 프론트엔드 측에서 좀 더 직관적으로 변경해주는것이 옳다고 판단된다.
◦
변수 명 등은 백엔드와 소통하여 결정짓도록 한다.
const data = {
postalCode: response.zonecode, // API에서 받은 zonecode를 postalCode로 변환
address: response.address,
detailAddress: userInputDetailAddress // 사용자가 입력한 상세주소
};
TypeScript
복사
•
detailAddress 세부 주소는 사용자 입력 필드의 값을 가져오도록 해야 한다.
◦
이 또한 주소 입력 부분은 주소 찾기 API 팝업으로 이동되도록 강제하고 입력이 끝난 이후엔 자동 입력, 이후 세부 주소 입력 필드로 커서를 이동 시키는 등 UX를 고려하여 설계하면 좋다.
•
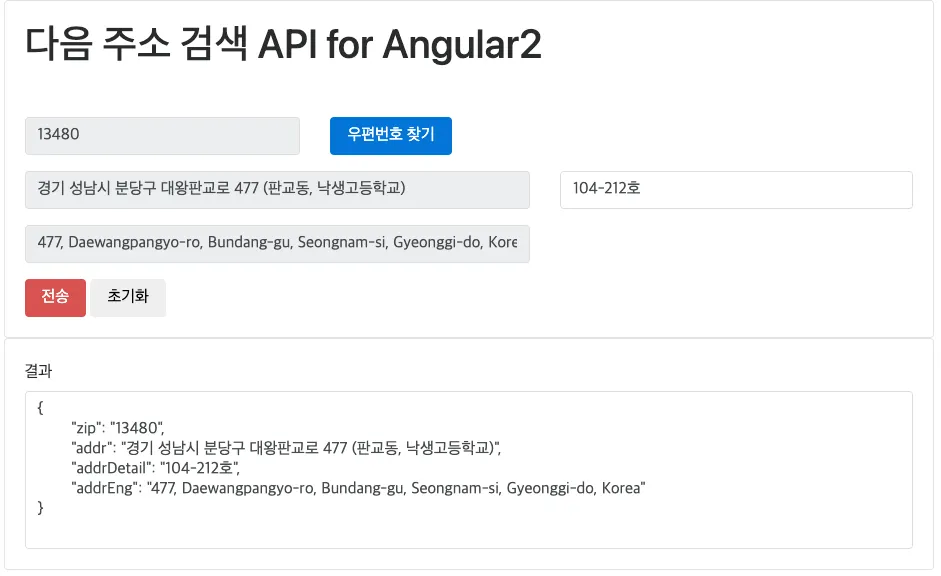
Angular 소스코드 참고자료
user.entity.ts에서 주소관련 필드 추가하기
•
기본적인 postalCode, address, detailAddress 정도로 구분
◦
주소를 통해서 특별한 부분 조회 등 기능은 기획하지 않고 있기 때문에 시스템을 간소화하는 목적으로 시/군/구/동 등의 정규화는 제외했다.
•
프론트엔드에서 보내오는 데이터의 명칭이 다른것은 DTO를 통해서 해결하면되기 때문에 백엔드에서는 최대한 아래와 같이 직관적인 명명규칙을 사용하는 것이 좋다.
◦
이는 프론트엔드와 백엔드가 최대한 명명규칙을 통일하는 것이 커뮤니케이션 혼란을 막을 수 있다.
◦
실제로 zipcode, addr1, addr2 같은 변수명도 관례적으로 자주 사용하기 때문에 고려할 대상이다.
import { Column, Entity, OneToMany, PrimaryGeneratedColumn } from "typeorm";
import { Article } from "src/article/article.entity";
import { UserRole } from "./user-role.enum";
import { BaseEntity } from "src/common/base.entity";
@Entity()
export class User extends BaseEntity{
@Column()
username: string;
@Column()
password: string;
@Column({ unique: true }) // 이메일은 중복되지 않도록 한다.
email: string;
@Column()
role: UserRole;
@Column({ nullable: true })
postalCode: string;
@Column({ nullable: true })
address: string;
@Column({ nullable: true })
detailAddress: string;
@OneToMany(Type => Article, article => article.author, { eager: false })
articles: Article[];
}
TypeScript
복사
sign-up-request.dto.ts
•
Daum 주소 API를 통해 제공되는 주소는 이미 검증된 데이터이므로, 백엔드에서 과도한 주소 유효성 검사는 필요하지 않을 수 있다.
•
하지만 사용자가 직접 입력하는 detailAddress 부분에는 유효성 검사가 필요할 수 있다.
•
다른 필드들도 기본적인 유효성 검사만 추가했다.
import { IsEmail, IsEnum, IsNotEmpty, Matches, MaxLength, MinLength } from "class-validator";
import { UserRole } from "../../user/user-role.enum";
export class SignUpRequestDto {
@IsNotEmpty() // null 값 체크
@MinLength(2) // 최소 문자 수
@MaxLength(20) // 최대 문자 수
// @IsAlphanumeric() // 영문 알파벳만 허용일 경우
@Matches(/^[가-힣]+$/, { message: 'Username must be in Korean characters', }) // 한글 이름인 경우
username: string;
@IsNotEmpty()
@MaxLength(20)
@Matches(/^(?=.*[A-Z])(?=.*[a-z])(?=.*\d)(?=.*[@$!%*?&])[A-Za-z\d@$!%*?&]{8,}$/, { message: 'Password too weak', }) // 대문자, 소문자, 숫자, 특수문자 포함
password: string;
@IsNotEmpty()
@IsEmail() // 이메일 형식
@MaxLength(100)
email: string;
@IsNotEmpty()
@IsEnum(UserRole) // 열거형 UserRole에 포함된 상태만 허용, USER / ADMIN
role: UserRole;
@IsNotEmpty()
@Matches(/^\d{5}$/, { message: 'Postal code must be 5 digits' }) // 우편번호는 5자리 숫자
postalCode: string;
@IsNotEmpty()
@MaxLength(100) // 주소는 최대 100자
address: string;
@MaxLength(100, { message: 'Detail address is too long' }) // 상세 주소는 선택적으로 최대 100자
detailAddress: string;
}
TypeScript
복사
auth.service.ts
•
회원 가입 시 주소 필드들을 가진 엔터티 객체가 생성되도록 필드 추가
import { ConflictException, Injectable, UnauthorizedException, Logger, Res } from '@nestjs/common';
import { InjectRepository } from '@nestjs/typeorm';
import { User } from "src/user/user.entity";
import { Repository } from 'typeorm';
import { SignUpRequestDto } from './dto/sign-up-request.dto';
import * as bcrypt from 'bcryptjs';
import { SignInRequestDto } from './dto/sign-in-request.dto';
import { JwtService } from '@nestjs/jwt';
@Injectable()
export class AuthService {
private readonly logger = new Logger(AuthService.name);
constructor(
@InjectRepository(User)
private usersRepository: Repository<User>,
private jwtService: JwtService
){}
// 회원 가입
async signUp(signUpRequestDto: SignUpRequestDto): Promise<User> {
const { username, password, email, role, postalCode, address, detailAddress } = signUpRequestDto;
this.logger.verbose(`Attempting to sign up user with email: ${email}`);
// 이메일 중복 확인
await this.checkEmailExists(email);
// 비밀번호 해싱
const hashedPassword = await this.hashPassword(password);
const user = this.usersRepository.create({
username,
password: hashedPassword, // 해싱된 비밀번호 사용
email,
role,
postalCode,
address,
detailAddress,
});
const savedUser = await this.usersRepository.save(user);
this.logger.verbose(`User signed up successfully with email: ${email}`);
this.logger.debug(`User details: ${JSON.stringify(savedUser)}`);
return savedUser;
}
// 로그인
...
}
TypeScript
복사
user-response.dto
•
주소를 기입한 회원이 주소 정보를 가지고 오는지 확인하기 위하여 추가
import { UserRole } from "src/user/user-role.enum";
import { User } from "src/user/user.entity";
export class UserResponseDto {
id: number;
username: string;
email: string;
role: UserRole;
createdAt: Date;
updatedAt: Date;
postalCode: string;
address: string;
detailAddress: string;
constructor(user: User){
this.id = user.id;
this.username = user.username;
this.email = user.email;
this.role = user.role;
this.createdAt = user.createdAt;
this.updatedAt = user.updatedAt;
this.postalCode = user.postalCode;
this.address = user.address;
this.detailAddress = user.detailAddress;
}
}
TypeScript
복사
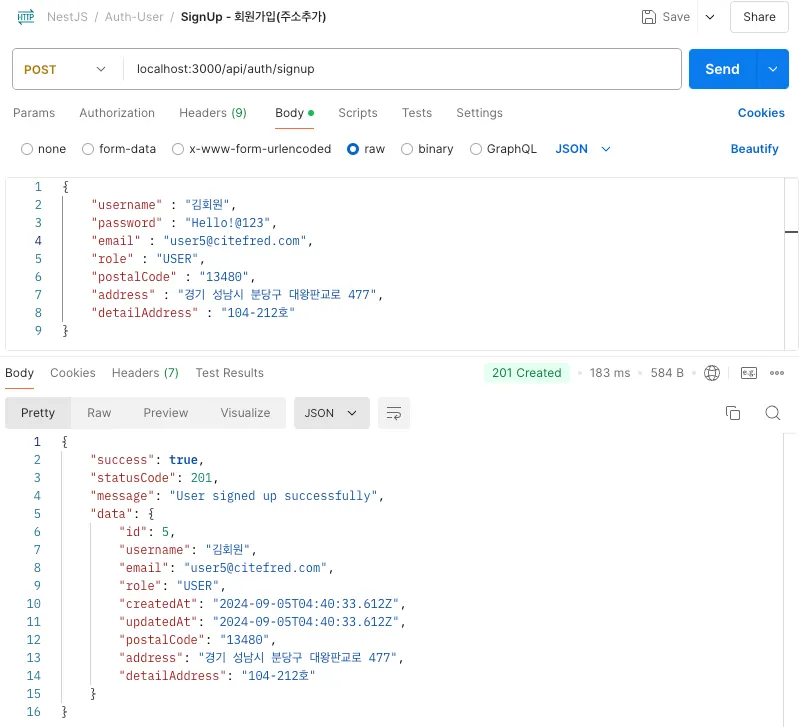
•
POSTMAN을 통한 테스트
Related Posts
Search


